Top Drywall Repair Techniques for Toronto Homes: A Step-by-Step Tutorial


Understanding Drywall Repair Needs
Drywall is a common material used in many Toronto homes due to its affordability and ease of installation. However, it can be prone to damage such as holes, cracks, and dents over time. Understanding the repair needs of your drywall is crucial to maintaining the aesthetic and structural integrity of your walls.
Before diving into repairs, assess the extent of the damage. Small holes and cracks can often be fixed with simple techniques, while larger areas of damage might require more extensive work. Properly identifying the type of repair needed can save you time and effort.
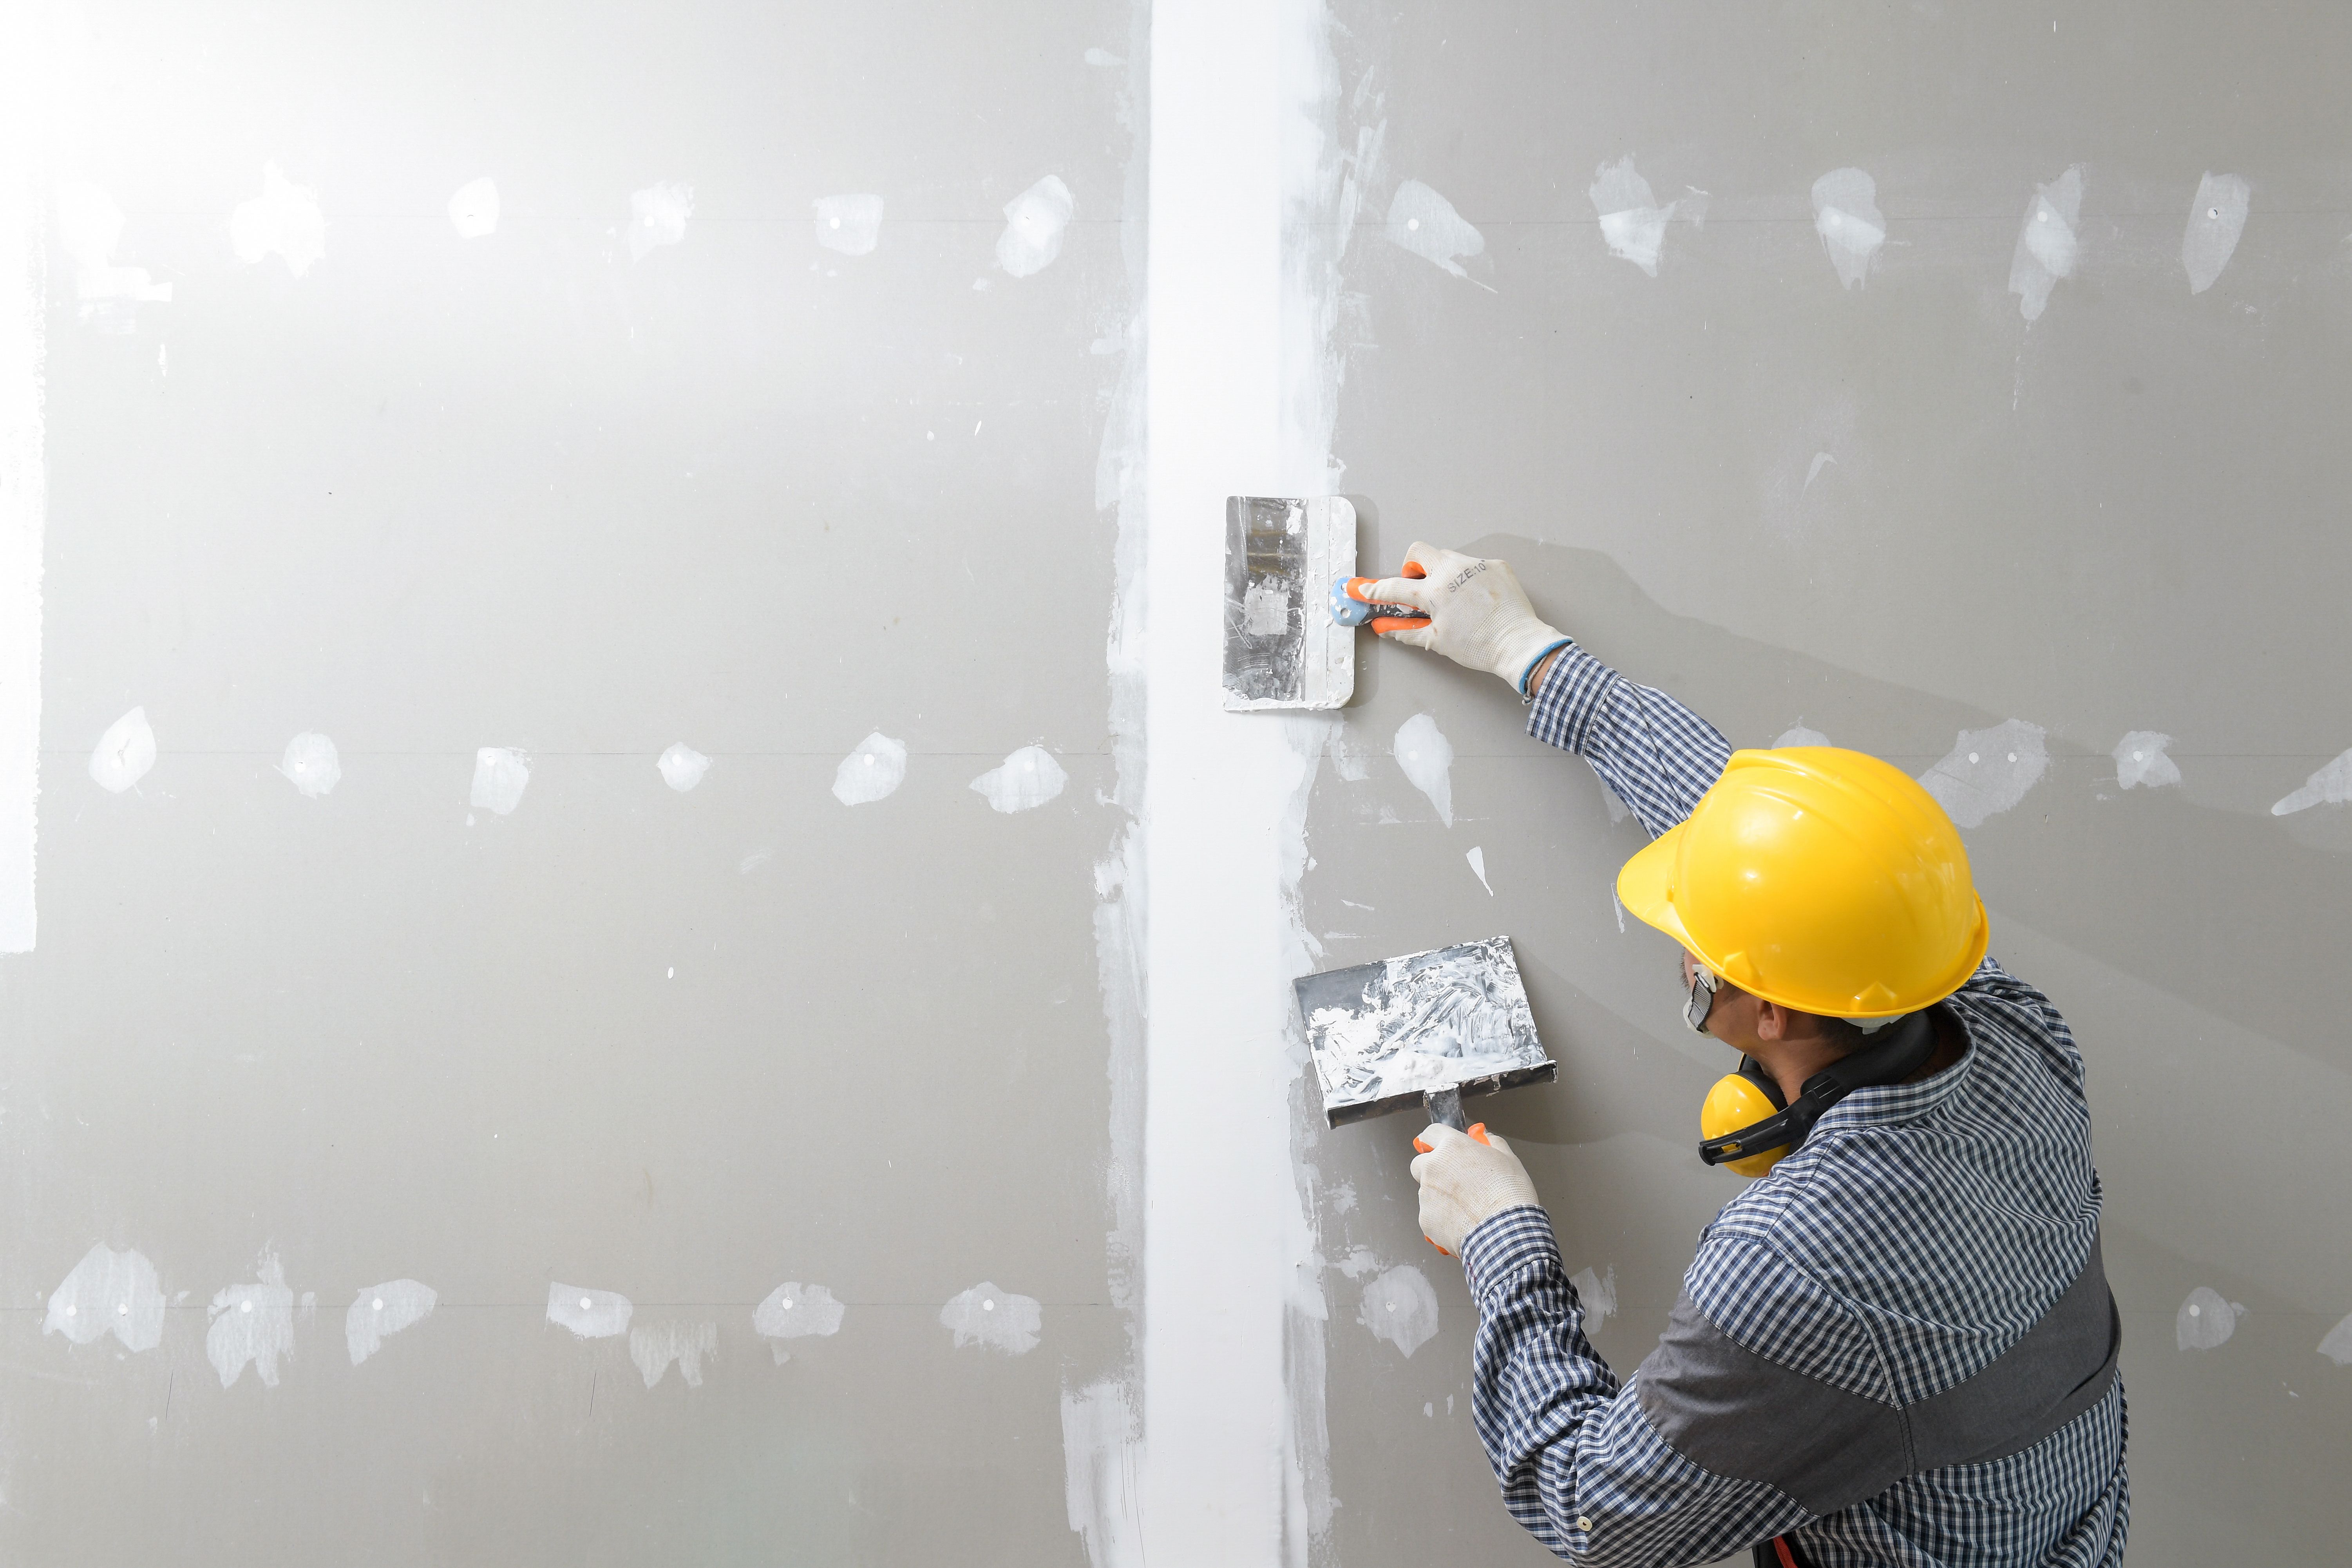
Basic Tools and Materials Required
To begin repairing drywall, gather the necessary tools and materials. Here's a list of essentials you might need:
- Drywall compound (also known as joint compound or mud)
- Putty knife
- Sandpaper or sanding sponge
- Drywall tape
- Utility knife
- Patching plaster for larger holes
Having these tools on hand will ensure you're prepared for any drywall repair task that comes your way.
Repairing Small Holes and Dents
Small holes and dents are among the most common drywall issues. Fortunately, they are also the easiest to fix. Follow these steps:
- Clean the area: Use a damp cloth to remove dust and debris from the hole or dent.
- Apply compound: Use a putty knife to apply drywall compound over the area, smoothing it out evenly.
- Smooth and sand: Once the compound is dry, sand it down to create a smooth surface that blends with the wall.
- Prime and paint: For a seamless finish, apply primer over the repaired area before painting to match the rest of the wall.

Fixing Large Holes
Repairing large holes in drywall requires a bit more work but is still manageable with some patience. Here's how to do it:
- Cut out the damaged area: Use a utility knife to cut a square around the damaged section.
- Create a patch: Cut a piece of new drywall slightly larger than the hole and fit it into the cut-out space.
- Tape and compound: Apply drywall tape around the edges of the patch and cover with compound, smoothing it out.
- Sand and finish: After the compound dries, sand it smooth. Apply primer and paint for a flawless look.
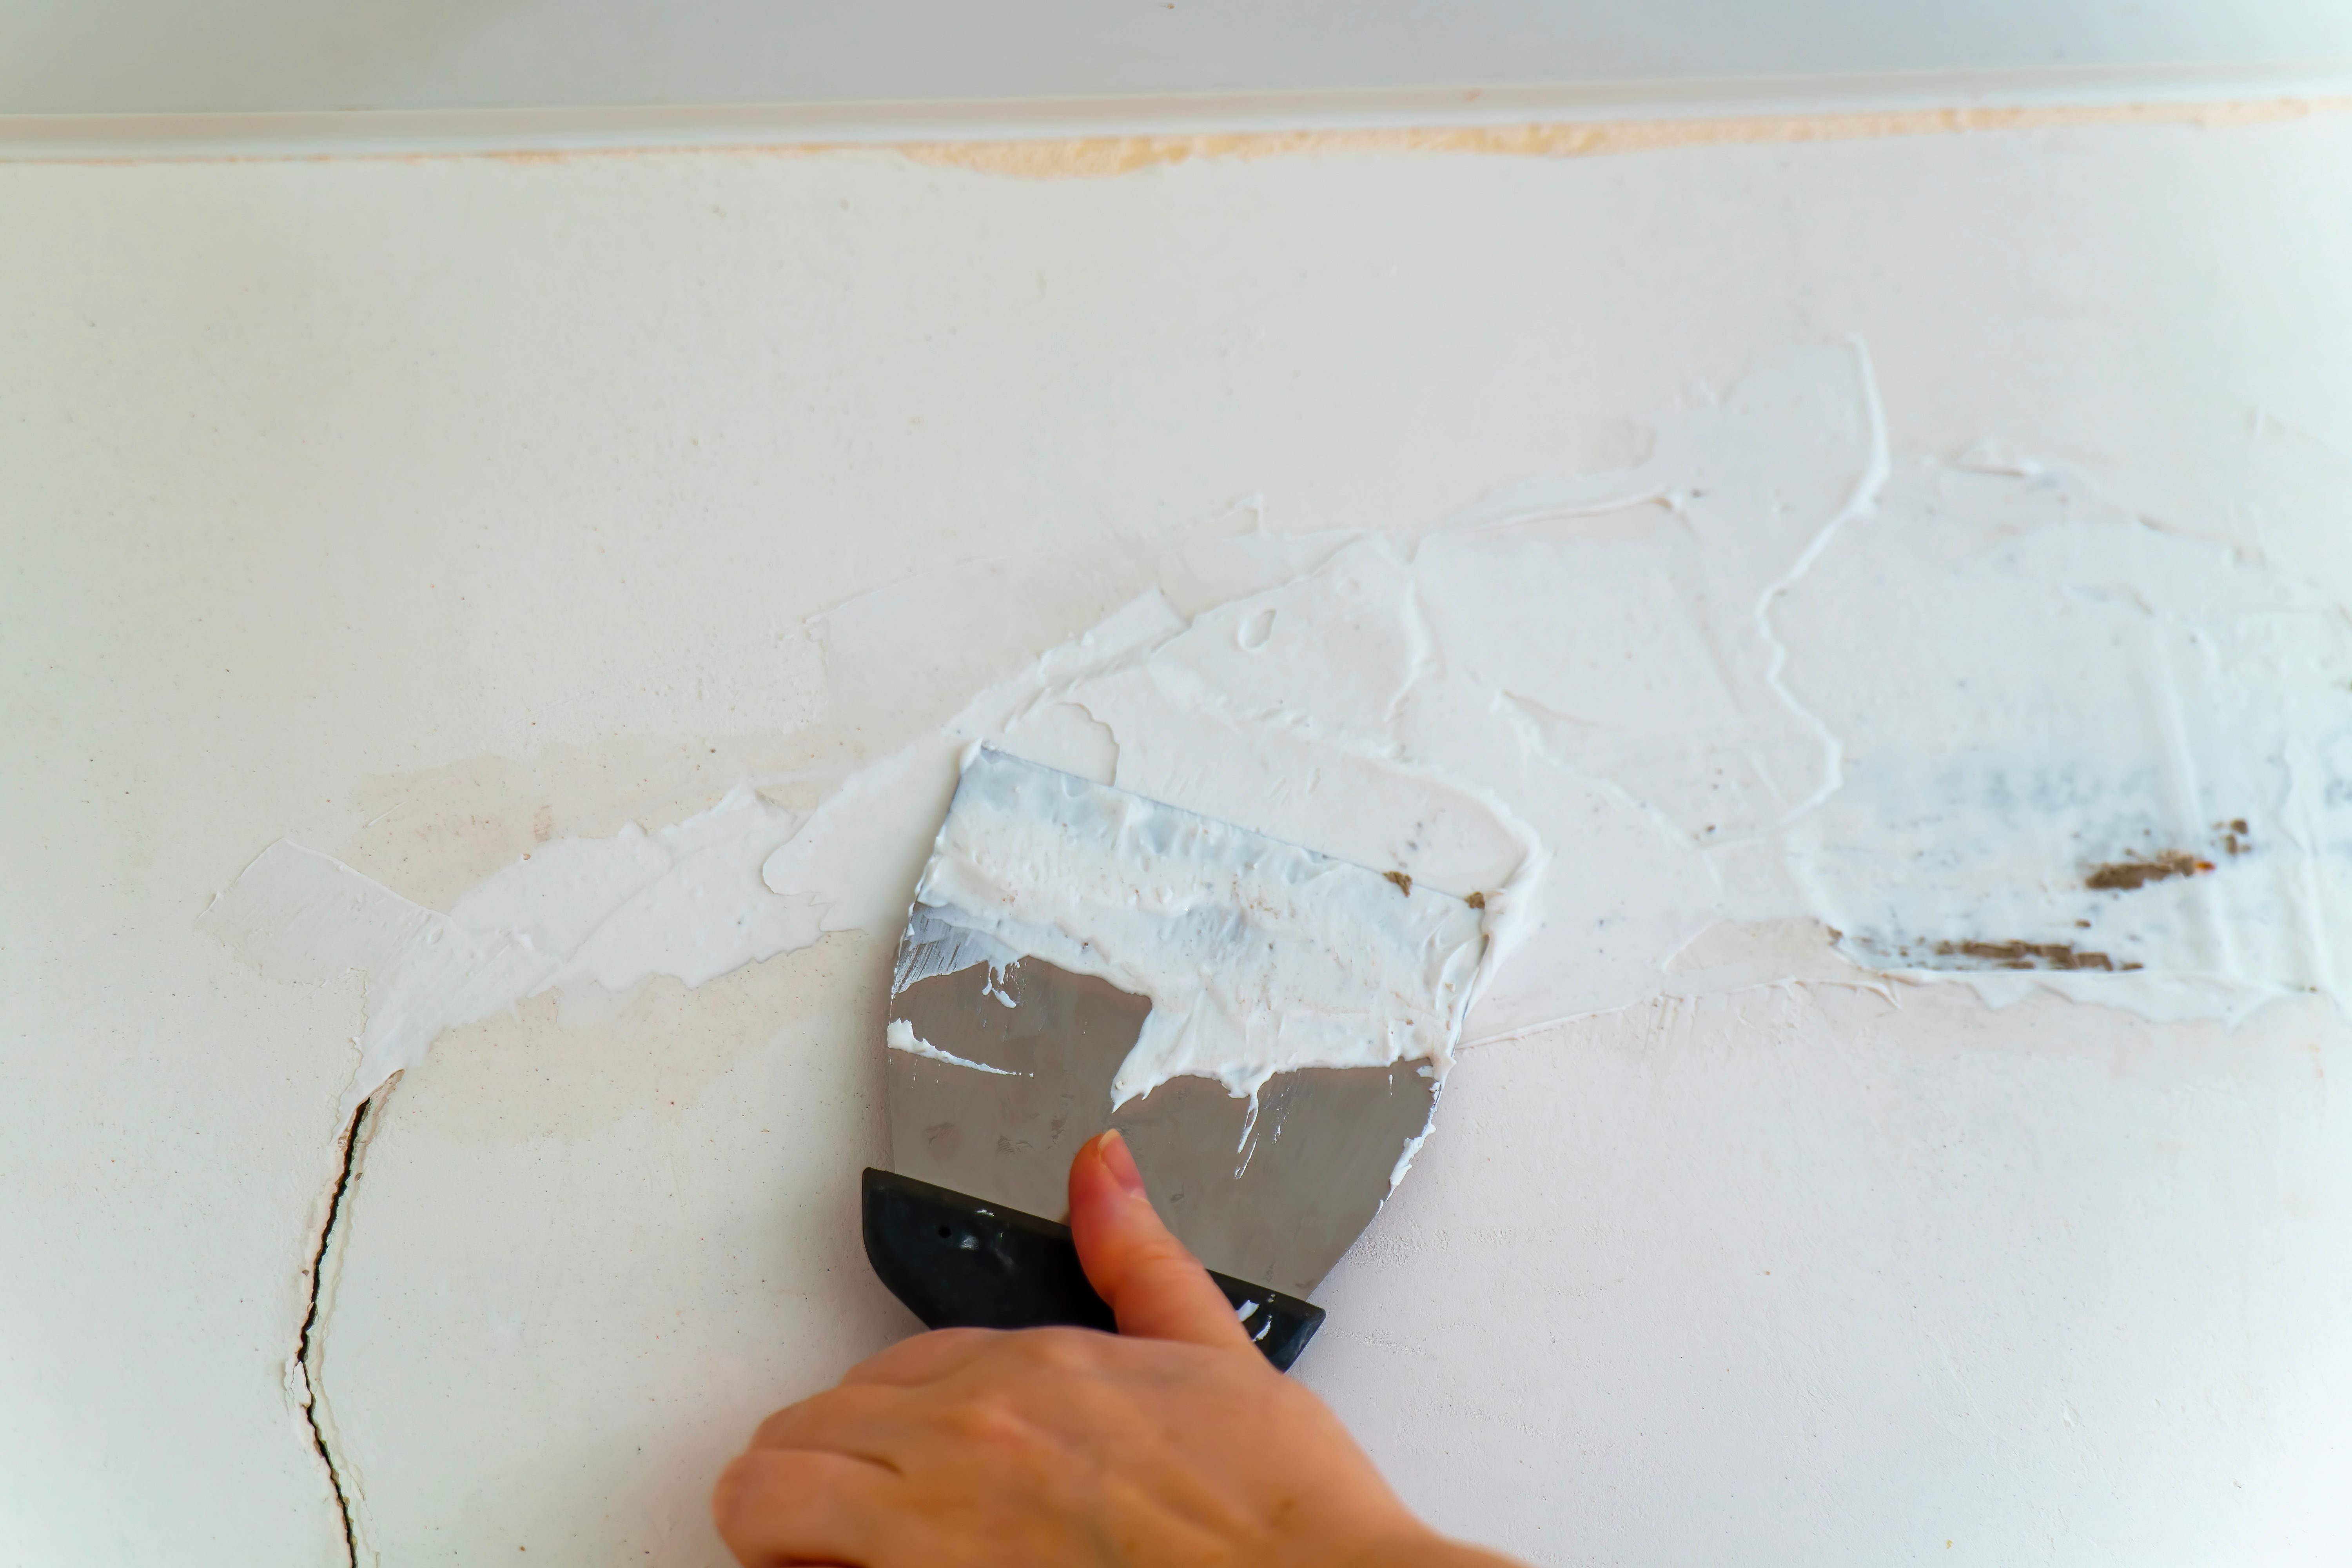
Tackling Cracks in Drywall
Cracks can develop in drywall due to settling or temperature changes. To repair them effectively, follow these steps:
- Open the crack: Use a utility knife to widen the crack slightly, creating a V-shape for better compound adhesion.
- Apply tape: Place drywall tape over the crack, pressing firmly to ensure it sticks well.
- Add compound: Cover the tape with several thin layers of drywall compound, allowing each layer to dry before adding the next.
- Sand and repaint: Sand the final layer smooth and repaint for a clean finish.
Preventive Measures for Future Damage
Once your drywall repairs are complete, consider taking preventive measures to avoid future damage. Here are some tips:
- Avoid excessive moisture: Keep humidity levels in check to prevent warping or mold growth.
- Cushion impacts: Be mindful of heavy furniture or objects that could dent or puncture walls.
- Regular maintenance: Inspect your walls periodically for signs of wear and address issues promptly.
By implementing these preventive measures, you can extend the life of your drywall and maintain its appearance for years to come.
Conclusion: Mastering Drywall Repairs
With these step-by-step techniques, repairing drywall in your Toronto home can be a straightforward process. Whether you're dealing with small holes, large patches, or pesky cracks, having the right tools and knowledge empowers you to tackle these projects with confidence. Remember, practice makes perfect, so don't hesitate to refine your skills with each repair job you undertake.
